Getting Started
Requirements
- GameMaker version
IDE v2024.13.1.193andRuntime v2024.13.1.242or above. - Basic familiarity with GameMaker and GML, including:
- Asset types (rooms, objects, sprites, etc).
- Objects and events.
- Structs, functions/methods and arguments, macros and enums.
Installation
- Download the latest
.yympspackage from the Releases page. - Import the package into your project.
- Navigate to Tools in the top toolbar and click Import Local Package, or just drag and drop the file into GameMaker.
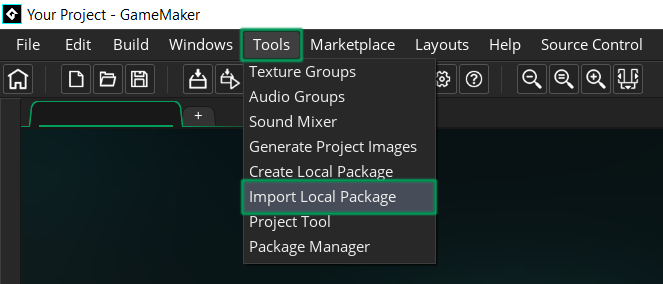
- Locate and select the
GMRoomLoader vX.X.X.yympslocal package in Explorer/Finder. - Click Add All.
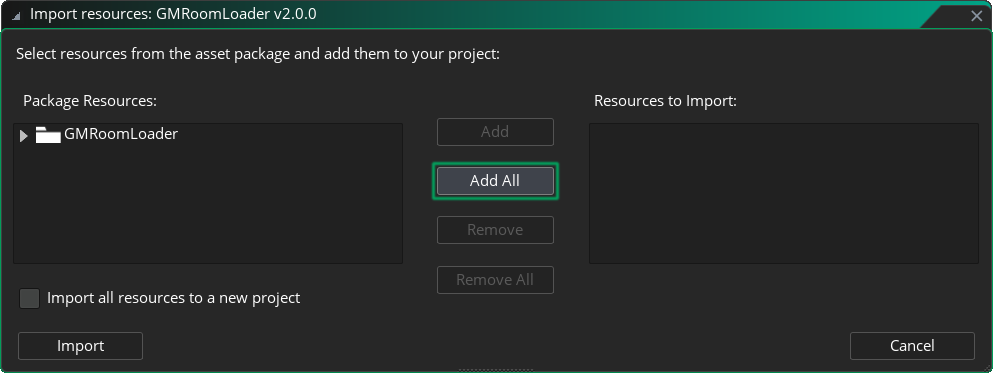
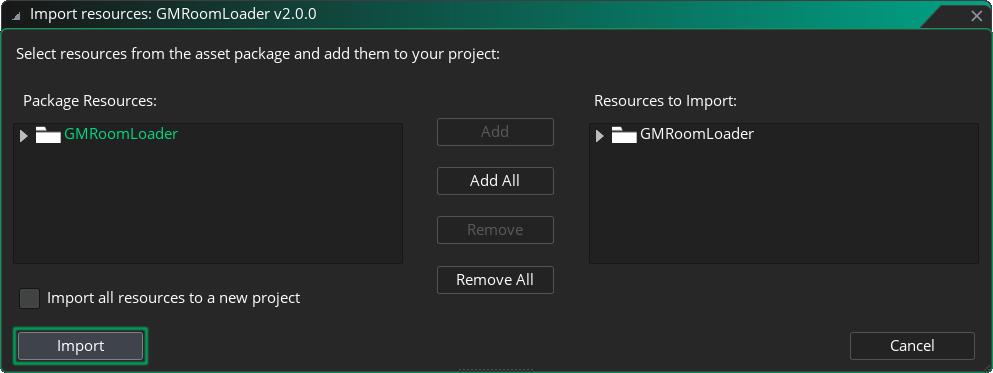
- Click Import.
- Navigate to Tools in the top toolbar and click Import Local Package, or just drag and drop the file into GameMaker.
- You're good to go! Next, check out the First Setup section below to load your first room.
UPDATING
If you already have GMRoomLoader installed and want to update to the latest version, check the Updating FAQ entry for instructions.
First Setup
While GMRoomLoader offers many tools for handling room data, loading rooms and working with created elements, the following Initialization, Loading and Cleanup methods are the only basics you need to get things working and load your first room!
Download the First Setup example project. @TODO
1. Initialize
Initialize the data for the room you want to load.
RoomLoader.DataInit(room);It's best to do this at the very start of your game in some "initialization" or "master" manager object. For this simple example, feel free to do it in the Create event of the object you'd like to handle your room loading, or at any point before loading the room.
2. Load
Load the room at the mouse position and store the returned Payload instance in a variable to clean up later.
payload = RoomLoader.Load(room, mouse_x, mouse_y, 0.5, 0.5);For this example, this can be called right after initialization in the Create event, or on a key press to see the room load in real time.
3. Clean Up
Clean Up (often called "unload" or "destroy") the loaded room when needed.
payload.Cleanup();4. All Together
Now that we know the required steps, let's put this together in a simple way for you to see it working. We'll do this in your object responsible for loading rooms.
- First, we'll initialize the data in the Create event.
- Then in the Step event, we'll load the room at the mouse position when we press 1, and unload the room when we press 2.
room = rmExample; // The room you'd like to load.
payload = undefined; // The variable to hold our Payload after loading.
RoomLoader.DataInit(room); // Initialize the data for "room".

Cleanup = function() { // The method we'll use to unload the loaded room.
    if (payload == undefined) return; // Only do this when a Payload exists.

    payload.Cleanup(); // Destroy all loaded layers and their elements.
    payload = undefined; // We're done here, dereference the payload so it can be picked up by the Garbage Collector.
};if (keyboard_check_pressed(ord("1"))) {
Cleanup(); // Clean up the loaded room.
// Load the room at the mouse position:
payload = RoomLoader.Load(room, mouse_x, mouse_y);
}
if (keyboard_check_pressed(ord("2"))) {
Cleanup(); // Clean up the loaded room.
}What's Next?
That's it for the basic setup! To learn more, check out:
- The FAQ page to find answers to common questions.
- The Demo page to see GMRoomLoader in action.
- The API section to explore all available methods.
- The Others section for Contact & Support, Upcoming Features and Credits.